
Como crear un MCP
Como desarrolladores, los MCP nos permiten potenciar los LLM para que trabajen como nosotros queremos. A continuación aprenderemos a como crear nuestro primer MCP
En este artículo vamos a construir un MCP server real desde cero paso a paso con TypeScript, el SDK oficial y una API pública gratuita (PokéAPI). Abajo del todo tienes un enlace a github con todo el proyecto para que puedas descargarlo.
Al terminar tendrás un servidor con tres tools:
Tool | Qué hace |
|---|---|
| Lista Pokémon paginados |
| Detalle de un Pokémon por nombre o id |
| Matchups y Pokémon de un tipo |
Qué vamos a construir
Un MCP mínimo, pensado para aprender:
TypeScript +
@modelcontextprotocol/sdk+ ZodCliente HTTP a PokéAPI (sin auth)
Tres tools read-only
Dos entradas: stdio (Cursor) y HTTP
/mcp(Inspector / ChatGPT)
Estructura del proyecto:
pokemon-mcp/
├── package.json
├── tsconfig.json
├── src/
│   ├── pokeapi-client.ts   # llamadas a PokéAPI
│   ├── server.ts           # McpServer + tools
│   ├── index.ts            # transporte stdio
│   ├── http.ts             # transporte HTTP
│   └── smoke-test.ts       # prueba rápida sin host
└── README.md
Separar cliente de API y server MCP es intencional: el MCP solo orquesta; la lógica de datos vive aparte. Así puedes reutilizar el cliente en tests o en una UI futura.
1. Inicializar el proyecto
Necesitas Node.js 18+.
mkdir pokemon-mcp && cd pokemon-mcp
npm init -y
En package.json usa módulos ES y scripts útiles:
{
  "name": "pokemon-mcp",
  "version": "0.1.0",
  "private": true,
  "type": "module",
  "scripts": {
    "dev": "tsx src/index.ts",
    "dev:http": "tsx src/http.ts",
    "build": "tsc",
    "smoke": "tsx src/smoke-test.ts"
  }
}
Instala dependencias:
npm install @modelcontextprotocol/sdk zod
npm install -D typescript tsx @types/node
@modelcontextprotocol/sdk— server, tools y transports.zod— schemas de input/output que el SDK convierte a JSON Schema.tsx— ejecuta TypeScript sin compilar en desarrollo.
tsconfig.json mínimo (NodeNext):
{
  "compilerOptions": {
    "target": "ES2022",
    "module": "NodeNext",
    "moduleResolution": "NodeNext",
    "outDir": "dist",
    "rootDir": "src",
    "strict": true,
    "skipLibCheck": true,
    "esModuleInterop": true
  },
  "include": ["src"]
}
2. Cliente de PokéAPI
Antes del MCP, encapsula la API externa. El modelo no debería ver el JSON crudo gigante de PokéAPI: tú normalizas a un objeto útil y estable.
Idea del cliente:
const DEFAULT_BASE_URL = "https://pokeapi.co/api/v2";

export class PokeApiClient {
  constructor(private readonly baseUrl = DEFAULT_BASE_URL) {}

  private async get<T>(path: string): Promise<T> {
    const response = await fetch(`${this.baseUrl}${path}`);

    if (response.status === 404) {
      throw new Error(`Not found: ${path}`);
    }
    if (!response.ok) {
      throw new Error(`PokéAPI error ${response.status} for ${path}`);
    }

    return (await response.json()) as T;
  }

  async getPokemon(nameOrId: string | number) {
    const key = String(nameOrId).trim().toLowerCase();
    const data = await this.get<any>(`/pokemon/${encodeURIComponent(key)}`);

    return {
      id: data.id,
      name: data.name,
      height: data.height,
      weight: data.weight,
      types: data.types.map((t: any) => t.type.name),
      abilities: data.abilities.map((a: any) => ({
        name: a.ability.name,
        isHidden: a.is_hidden,
      })),
      stats: data.stats.map((s: any) => ({
        name: s.stat.name,
        baseStat: s.base_stat,
      })),
      spriteUrl: data.sprites.front_default,
      speciesUrl: data.species.url,
    };
  }
}
Qué está pasando:
getcentraliza errores HTTP (404 vs 5xx).getPokemonacepta nombre (pikachu) o id (25).Devolvemos un DTO limpio: tipos, habilidades, stats, sprite.
En el repo real también hay listPokemon y getType con el mismo patrón. Empieza por una operación; luego añade más tools.
3. Crear el MCP server
El corazón es McpServer: nombre estable, versión e instructions globales.
import { McpServer } from "@modelcontextprotocol/sdk/server/mcp.js";
import { z } from "zod";
import { PokeApiClient } from "./pokeapi-client.js";

export function createPokemonMcpServer() {
  const pokeapi = new PokeApiClient(
    process.env.POKEAPI_BASE_URL ?? "https://pokeapi.co/api/v2"
  );

  const server = new McpServer(
    {
      name: "pokemon-mcp",
      version: "0.1.0",
    },
    {
      instructions:
        "Use list_pokemon to browse Pokémon. Use get_pokemon for one Pokémon by name or id. Use get_type for type matchups. Prefer stable ids/names from tool results in follow-up calls.",
    }
  );

  // aquí registraremos las tools…

  return server;
}
¿Para qué sirven las instructions?
Son orientación para el modelo durante la inicialización: orden recomendado de tools, convenciones de parámetros, límites. OpenAI recomienda poner lo importante al principio (aprox. los primeros 512 caracteres) y no repetir la descripción de cada tool ni intentar “cambiar la personalidad” del modelo.
Buenas instructions:
“Antes de actualizar, llama a
get_project.”“Usa camelCase:
originCode, noorigin_code.”
Malas instructions:
Pegar el README entero.
“Sé gracioso y habla como un borracho.”
4. Registrar tools, la parte más importante
OpenAI sugiere: una tool por acción reconocible. Mejor list_pokemon + get_pokemon que un único pokemon_action con un modo mágico.
Cada tool necesita:
Nombre orientado a acción (
get_pokemon).Title legible para humanos.
Description que diga cuándo usarla (el modelo decide con esto).
inputSchema explícito (Zod).
outputSchema si devuelves datos estructurados.
annotations de seguridad.
Handler que valida, autoriza (si aplica) y ejecuta.
Annotations
const READ_ONLY = {
  readOnlyHint: true,      // no cambia estado
  openWorldHint: true,     // toca sistema externo (PokéAPI)
  destructiveHint: false,  // no es irreversible
} as const;
Annotation | Significado |
|---|---|
| Solo lectura; el host puede auto-aprobar más fácil |
| Efectos difíciles de deshacer |
| Afecta sistemas externos / públicos |
Son pistas para el cliente, no sustituyen tu autorización real.
Ejemplo completo: get_pokemon
server.registerTool(
  "get_pokemon",
  {
    title: "Get Pokémon details",
    description:
      "Use this when the user asks about a specific Pokémon. Accepts a name (e.g. pikachu) or numeric id.",
    inputSchema: {
      nameOrId: z
        .string()
        .min(1)
        .describe("Pokémon name or id, e.g. pikachu or 25."),
    },
    outputSchema: {
      id: z.number().int(),
      name: z.string(),
      height: z.number(),
      weight: z.number(),
      types: z.array(z.string()),
      abilities: z.array(
        z.object({
          name: z.string(),
          isHidden: z.boolean(),
        })
      ),
      stats: z.array(
        z.object({
          name: z.string(),
          baseStat: z.number().int(),
        })
      ),
      spriteUrl: z.string().nullable(),
      speciesUrl: z.string(),
    },
    annotations: READ_ONLY,
  },
  async ({ nameOrId }) => {
    try {
      const pokemon = await pokeapi.getPokemon(nameOrId);

      return {
        // datos tipados para el modelo (siguientes llamadas)
        structuredContent: pokemon,
        // resumen en texto para responder al usuario
        content: [
          {
            type: "text",
            text: `${pokemon.name} (#${pokemon.id}) — types: ${pokemon.types.join(", ")}.`,
          },
        ],
      };
    } catch (error) {
      const message =
        error instanceof Error ? error.message : "Unknown PokéAPI error";
      return {
        isError: true,
        content: [{ type: "text", text: message }],
      };
    }
  }
);
Cómo leer este código
description— no digas solo “obtiene un Pokémon”; di cuándo usarla..describe()en Zod — ayuda al modelo a rellenar argumentos.structuredContent— objeto estable (id,name…) para encadenar tools.content— texto legible; el host lo usa para contestar.isError: true— error controlado (Pokémon inexistente) sin tumbar el server.
list_pokemon (paginación)
Misma idea, con parámetros opcionales:
inputSchema: {
  limit: z.number().int().min(1).max(100).optional()
    .describe("Page size. Defaults to 20, max 100."),
  offset: z.number().int().min(0).optional()
    .describe("Number of results to skip. Defaults to 0."),
}
En el handler:
const pageLimit = limit ?? 20;
const pageOffset = offset ?? 0;
const page = await pokeapi.listPokemon(pageLimit, pageOffset);

return {
  structuredContent: {
    count: page.count,
    limit: pageLimit,
    offset: pageOffset,
    results: page.results,
  },
  content: [
    {
      type: "text",
      text: `Found ${page.count} Pokémon total. Showing ${page.results.length} from offset ${pageOffset}.`,
    },
  ],
};
Patrón reusable: defaults en el handler, límites en el schema, ids estables en el resultado.
5. Transports: stdio y HTTP
El mismo createPokemonMcpServer() se conecta a distintos transports. Así no duplicas tools.
Stdio (Cursor / procesos locales)
// src/index.ts
import { StdioServerTransport } from "@modelcontextprotocol/sdk/server/stdio.js";
import { createPokemonMcpServer } from "./server.js";

const server = createPokemonMcpServer();
const transport = new StdioServerTransport();
await server.connect(transport);
El host lanza tu proceso y habla por stdin/stdout. Ideal en desarrollo local.
Streamable HTTP (ChatGPT / MCP Inspector)
ChatGPT no usa stdio: necesita un endpoint HTTPS (en local, HTTP + túnel).
// src/http.ts (idea simplificada)
import { createServer } from "node:http";
import { StreamableHTTPServerTransport } from "@modelcontextprotocol/sdk/server/streamableHttp.js";
import { createPokemonMcpServer } from "./server.js";

const port = Number(process.env.PORT ?? 8787);
const MCP_PATH = "/mcp";

createServer(async (req, res) => {
  const url = new URL(req.url!, `http://${req.headers.host}`);

  if (url.pathname === MCP_PATH && ["POST", "GET", "DELETE"].includes(req.method!)) {
    const server = createPokemonMcpServer();
    const transport = new StreamableHTTPServerTransport({
      sessionIdGenerator: undefined,
      enableJsonResponse: true,
    });

    res.on("close", () => {
      transport.close();
      server.close();
    });

    await server.connect(transport);
    await transport.handleRequest(req, res);
    return;
  }

  res.writeHead(404).end("Not Found");
}).listen(port, () => {
  console.log(`MCP listening on http://localhost:${port}${MCP_PATH}`);
});
Puntos clave:
Path estable: normalmente
/mcp.CORS/OPTIONS si pruebas desde navegador o Inspector.
Un server + transport por request (patrón simple y seguro para demos).
6. Probar que funciona
Smoke test (sin ChatGPT ni Cursor)
Prueba el cliente de API primero:
npm run smoke
Si ves algo como get_pokemon: pikachu (#25) types=electric, la integración con PokéAPI está bien.
MCP Inspector
npm run dev:http
En otra terminal:
npx @modelcontextprotocol/inspector@latest \
  --server-url http://localhost:8787/mcp \
  --transport http
Checklist:
Initialize OK (nombre, versión, instructions).
tools/listmuestra las tres tools.Llamas
get_pokemonconpikachuy con un id inventado (error controlado).Revisas annotations y schemas.
Conectar en Cursor
En la config MCP del editor (sustituye PATH_TO_REPO):
{
  "mcpServers": {
    "pokemon-mcp": {
      "command": "node",
      "args": [
        "./node_modules/tsx/dist/cli.mjs",
        "src/index.ts"
      ],
      "cwd": "PATH_TO_REPO"
    }
  }
}
Si Cursor no encuentra node (muy típico con nvm), pon la ruta absoluta de tu binario de Node en command. El error clásico es spawn npm ENOENT o spawn node ENOENT.
Luego pregunta en el chat: “¿Qué tipo es Pikachu?” y deberías ver la llamada a get_pokemon.
ChatGPT (developer mode)
npm run dev:httpExpón el puerto con un túnel (
ngrok http 8787, etc.).Activa Developer mode en ChatGPT.
Crea un connector apuntando a
https://TU-DOMINIO/mcp.
Para publicación real hace falta HTTPS estable; un túnel vale para desarrollo, no siempre para submission pública.
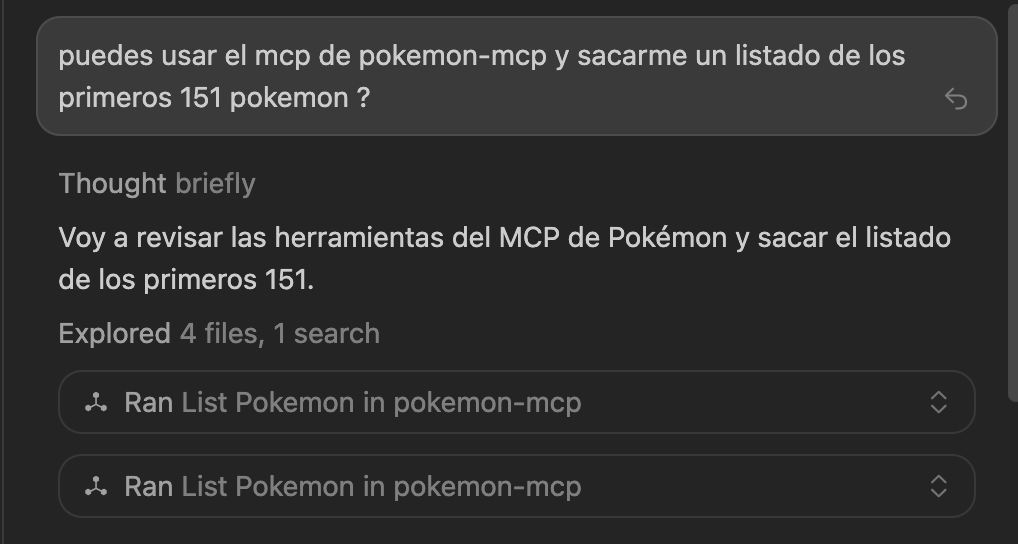
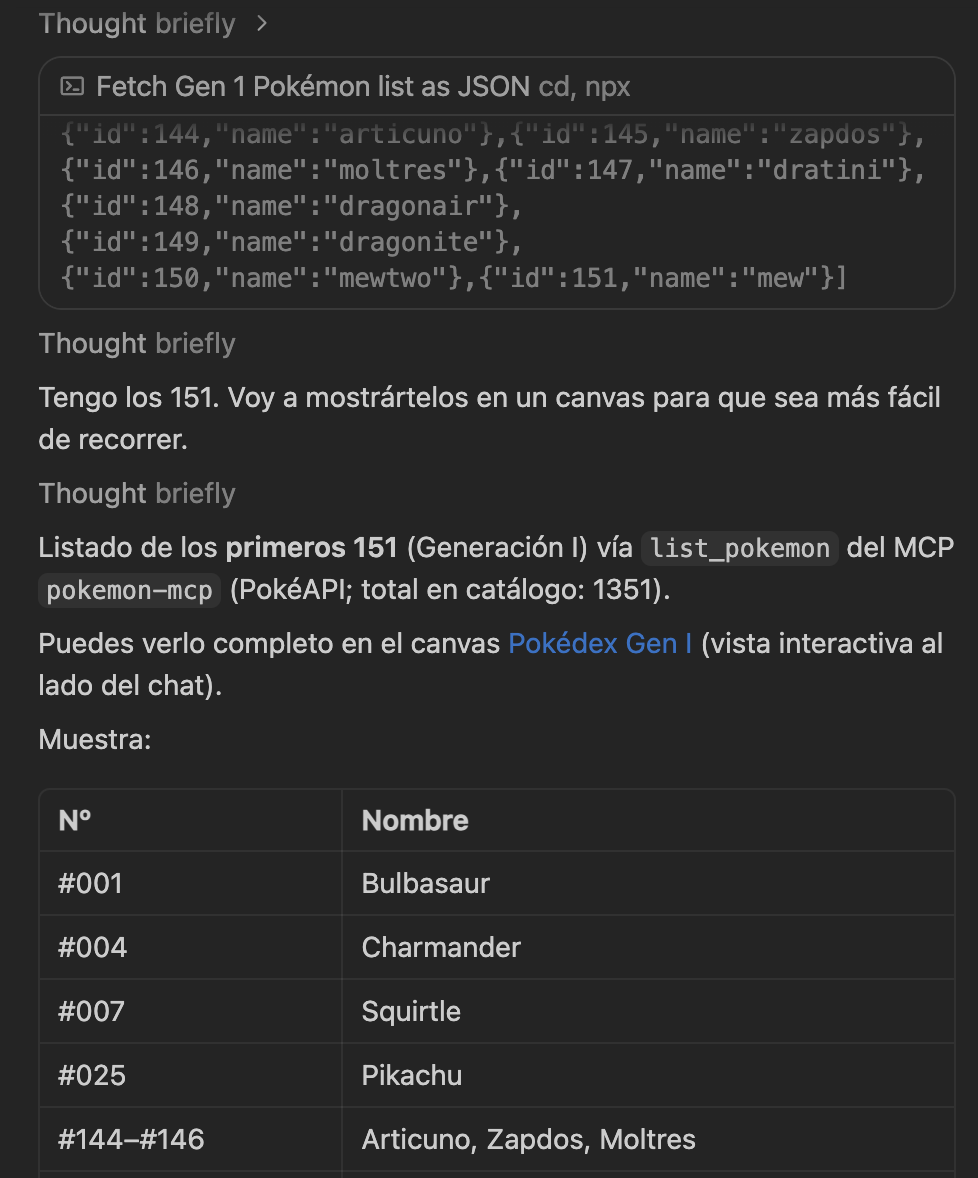
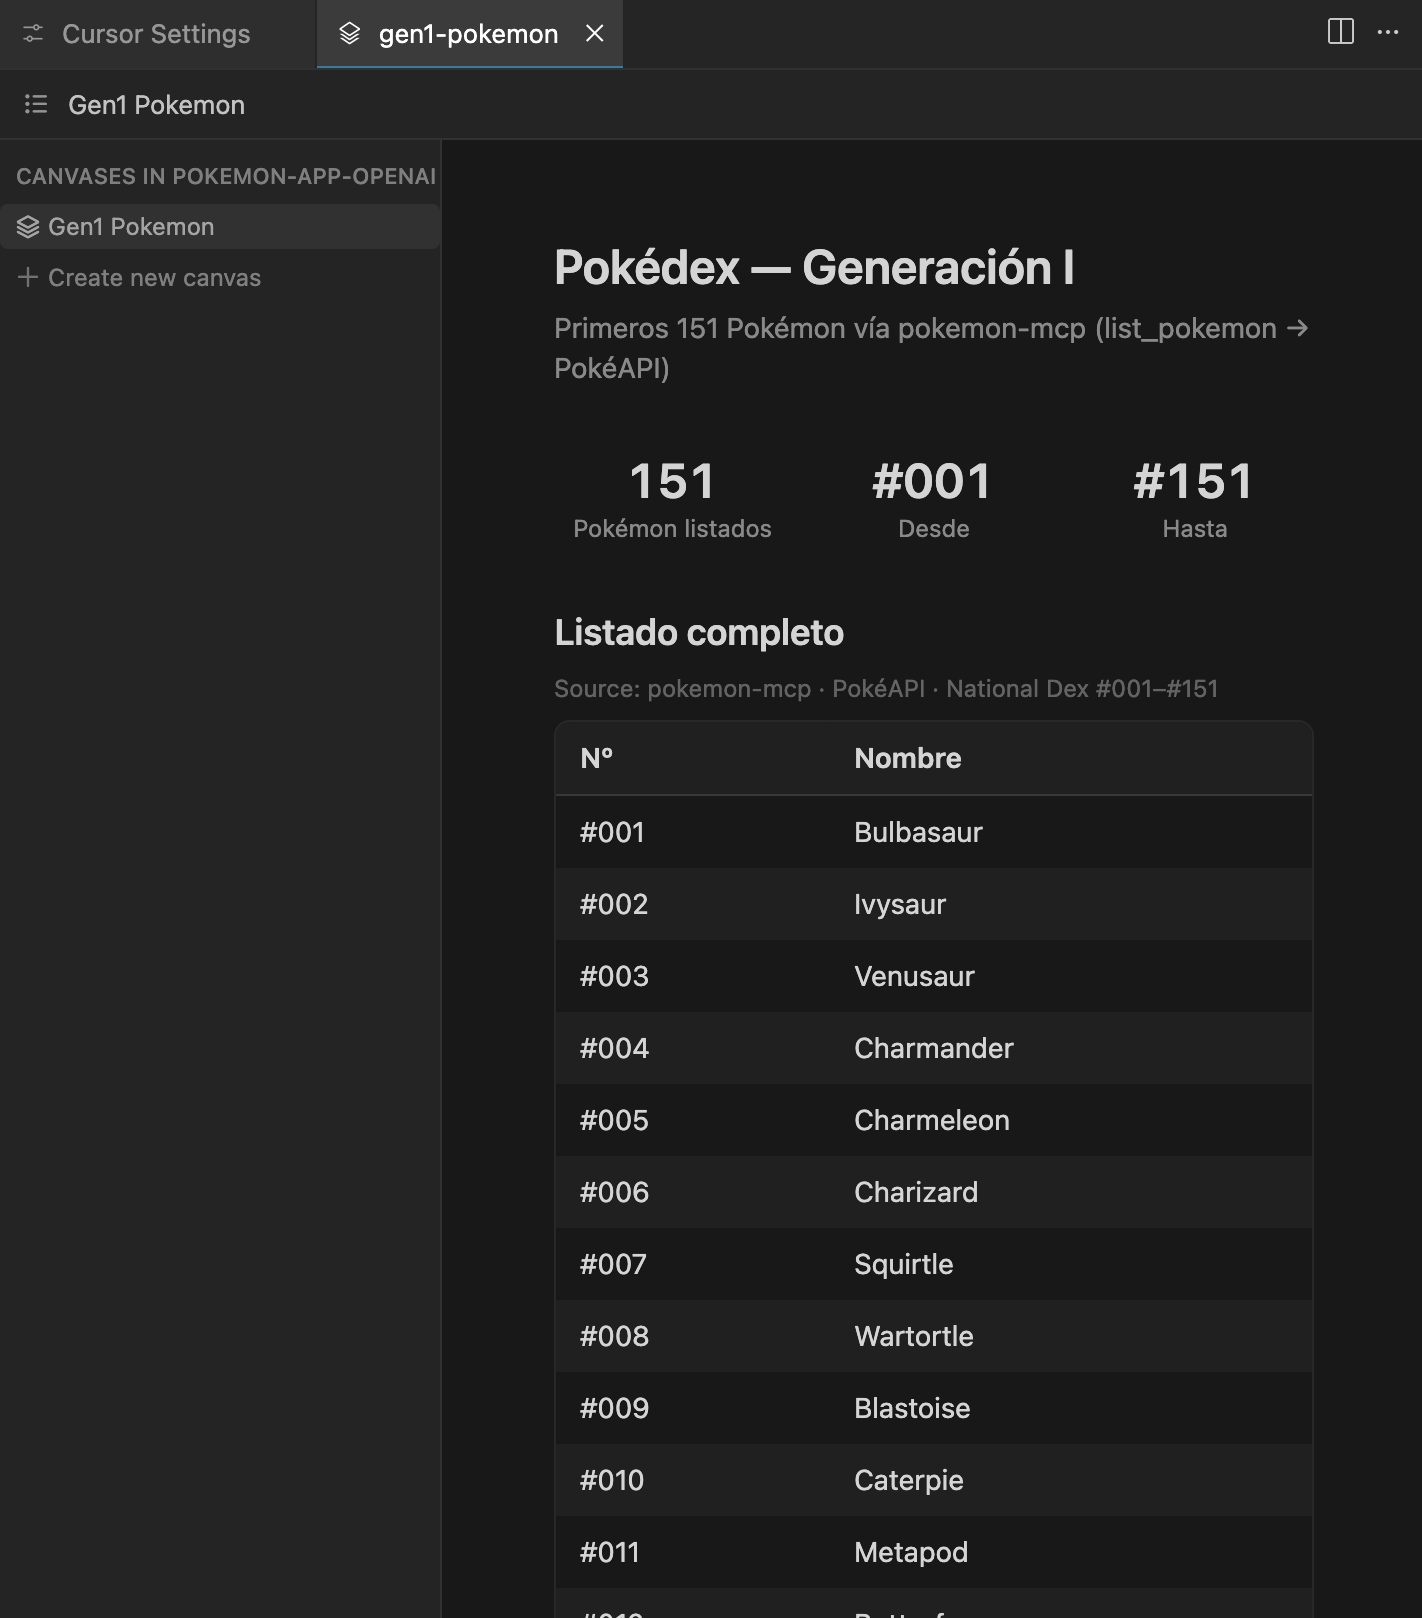
9. Probando nuestro MCP
Una vez tengamos todo esto funcionando, podemos preguntar a nuestro agente.
8. Buenas prácticas
Diseña desde objetivos de usuario, no desde endpoints.
“Consultar un Pokémon” →get_pokemon. “Listar catálogo” →list_pokemon.Schemas claros > prompts largos.
El modelo se guía pordescription,inputSchemay annotations.Devuelve ids estables en
structuredContentpara encadenar tools.No metas secretos en resultados ni en metadata.
Valida y autoriza en el server.
El modelo no es tu capa de seguridad.Annota con honestidad.
Si escribes en una DB, no marquesreadOnlyHint: true.Una capa de dominio + una capa MCP.
Facilita tests (smoke) y una UI futura.
9. Cómo adaptar esto a tu API
Sustituye PokéAPI por lo que necesites:
En este tutorial | En tu proyecto |
|---|---|
| Cliente de tu API / DB |
|
|
|
|
|
|
Sin auth | OAuth / API keys en el server |
Plantilla mental de una tool nueva:
server.registerTool(
  "get_order",
  {
    title: "Get order",
    description: "Use when the user asks for the status of one order by id.",
    inputSchema: {
      orderId: z.string().min(1).describe("Order id from list_orders."),
    },
    outputSchema: {
      id: z.string(),
      status: z.string(),
      total: z.number(),
    },
    annotations: {
      readOnlyHint: true,
      openWorldHint: false,
      destructiveHint: false,
    },
  },
  async ({ orderId }) => {
    const order = await orders.get(orderId);
    return {
      structuredContent: order,
      content: [{ type: "text", text: `Order ${order.id}: ${order.status}` }],
    };
  }
);
Siguiente artículo
Cuando las tools funcionen de punta a punta, el siguiente paso natural es añadir UI al MCP (widgets en ChatGPT): asociar un resource HTML a tools concretas y pasar de “el modelo te cuenta los datos” a “ves una interfaz interactiva”.
Si quieres ver o descargarte el proyecto completo, aquí tienes el enlace https://github.com/omy13/pokemon-app-openai